实际
2020-04-29 15:01:38
此篇文章使用版本:2.2.2.RELEASE
JDBC
pom.xml
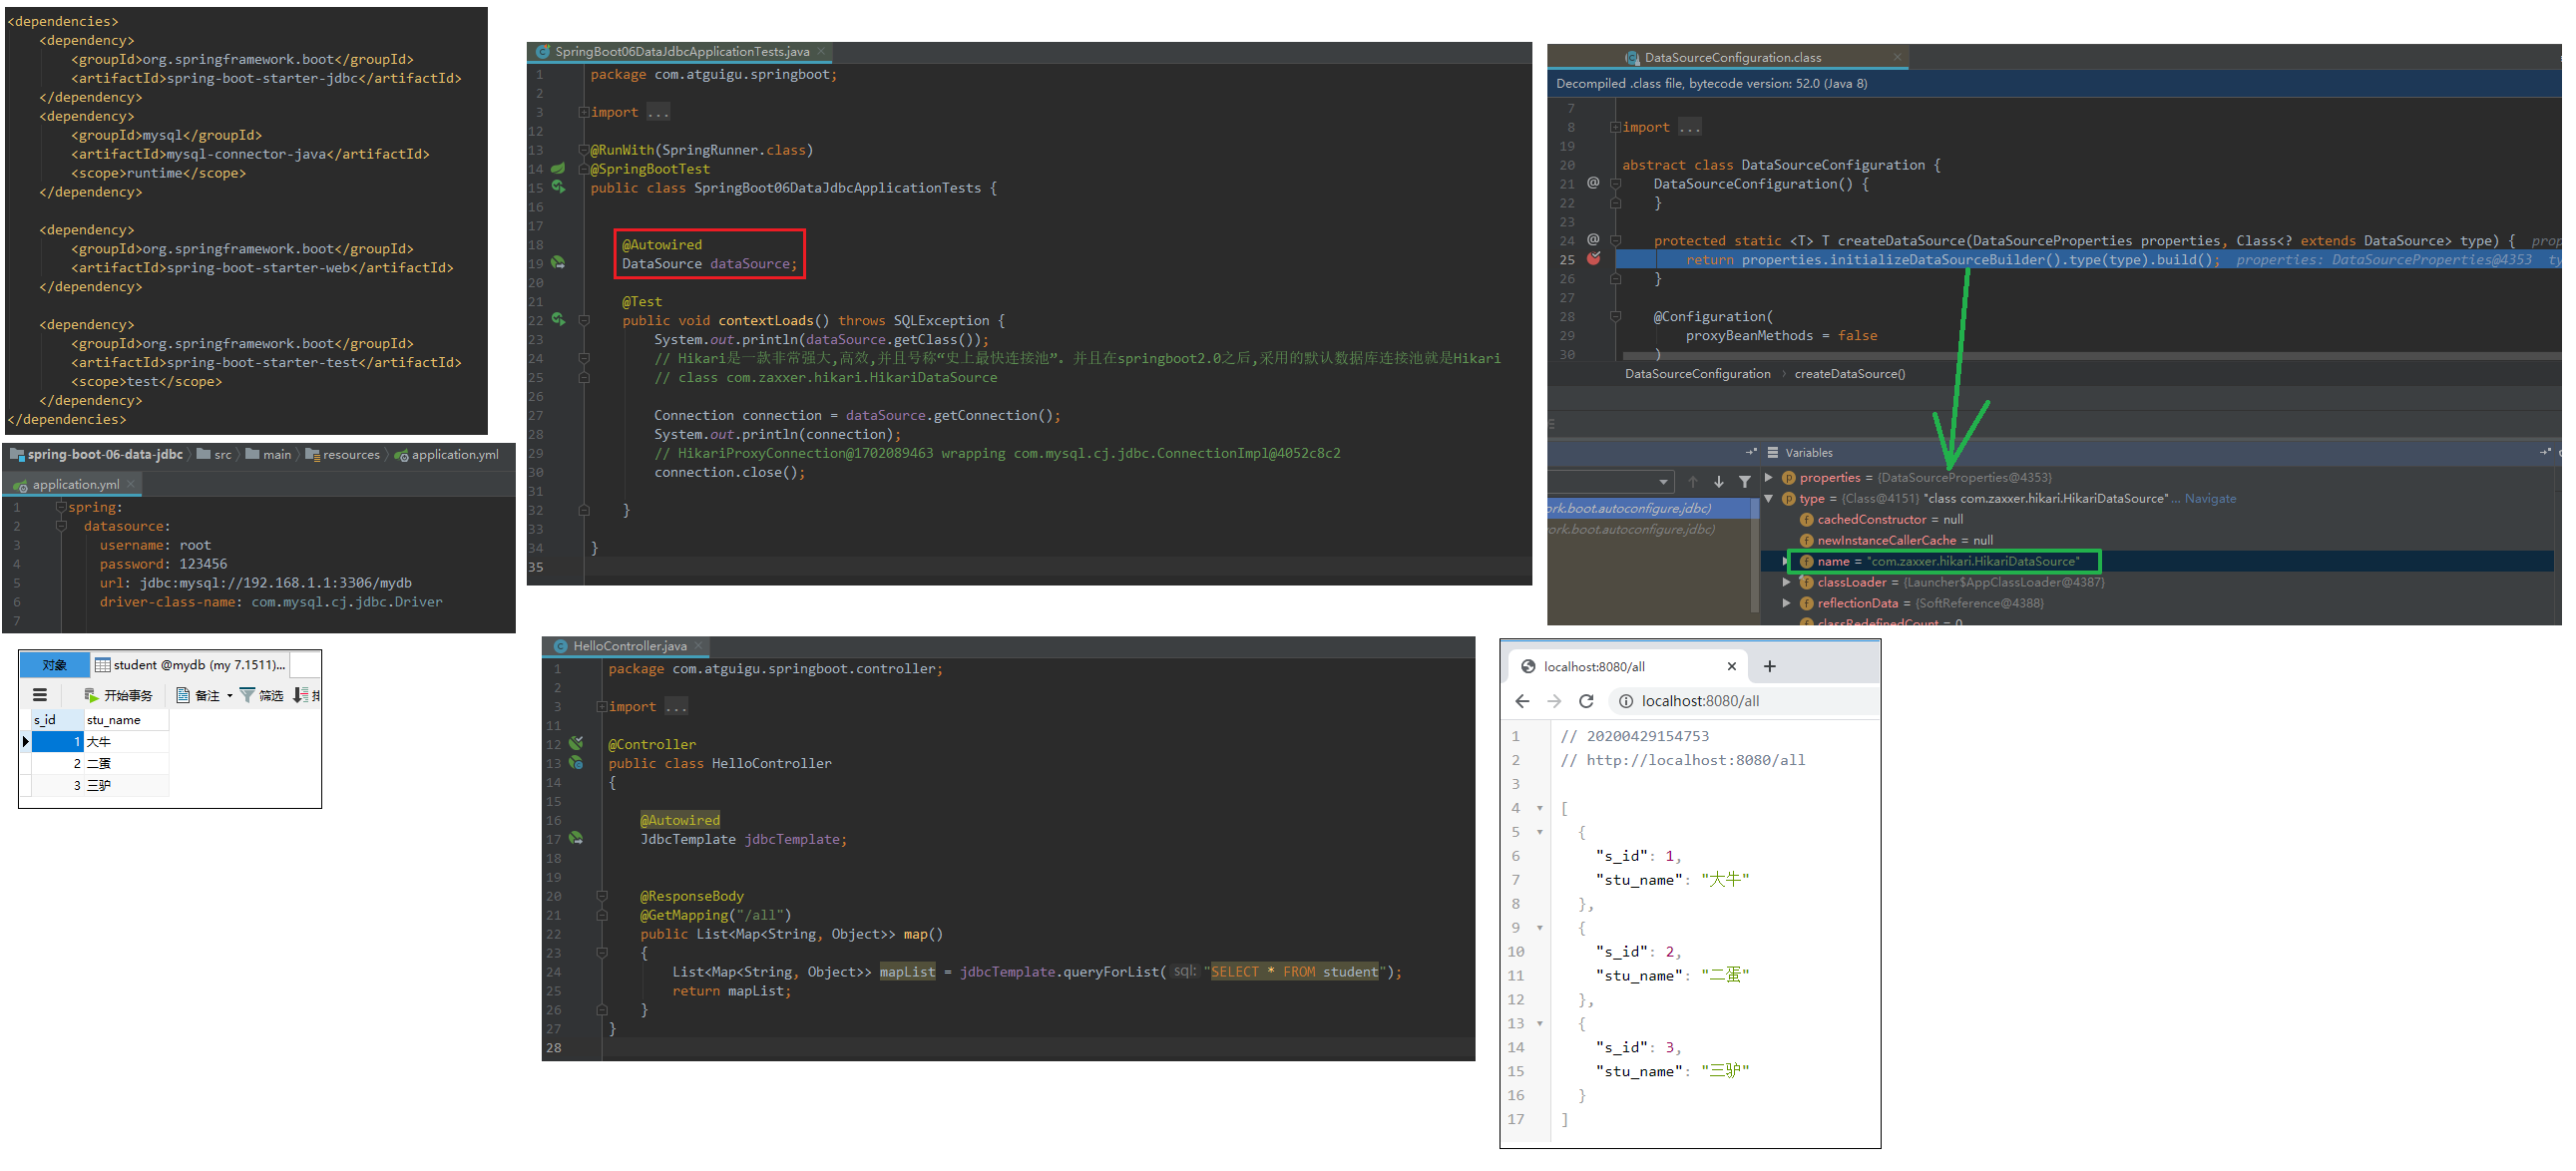
1 | <dependencies> |
student.sql
1 | /* |
默认是com.zaxxer.hikari.HikariDataSource作为数据源;
数据源的相关配置都在DataSourceProperties里面;
自动配置原理:org.springframework.boot.autoconfigure.jdbc:
1、参考DataSourceConfiguration,根据配置创建数据源,默认使用Hikari连接池;可以使用spring.datasource.type指定自定义的数据源类型;
2、SpringBoot默认可以支持;
1 | "com.zaxxer.hikari.HikariDataSource", "org.apache.tomcat.jdbc.pool.DataSource", "org.apache.commons.dbcp2.BasicDataSource" |
整合Druid数据源
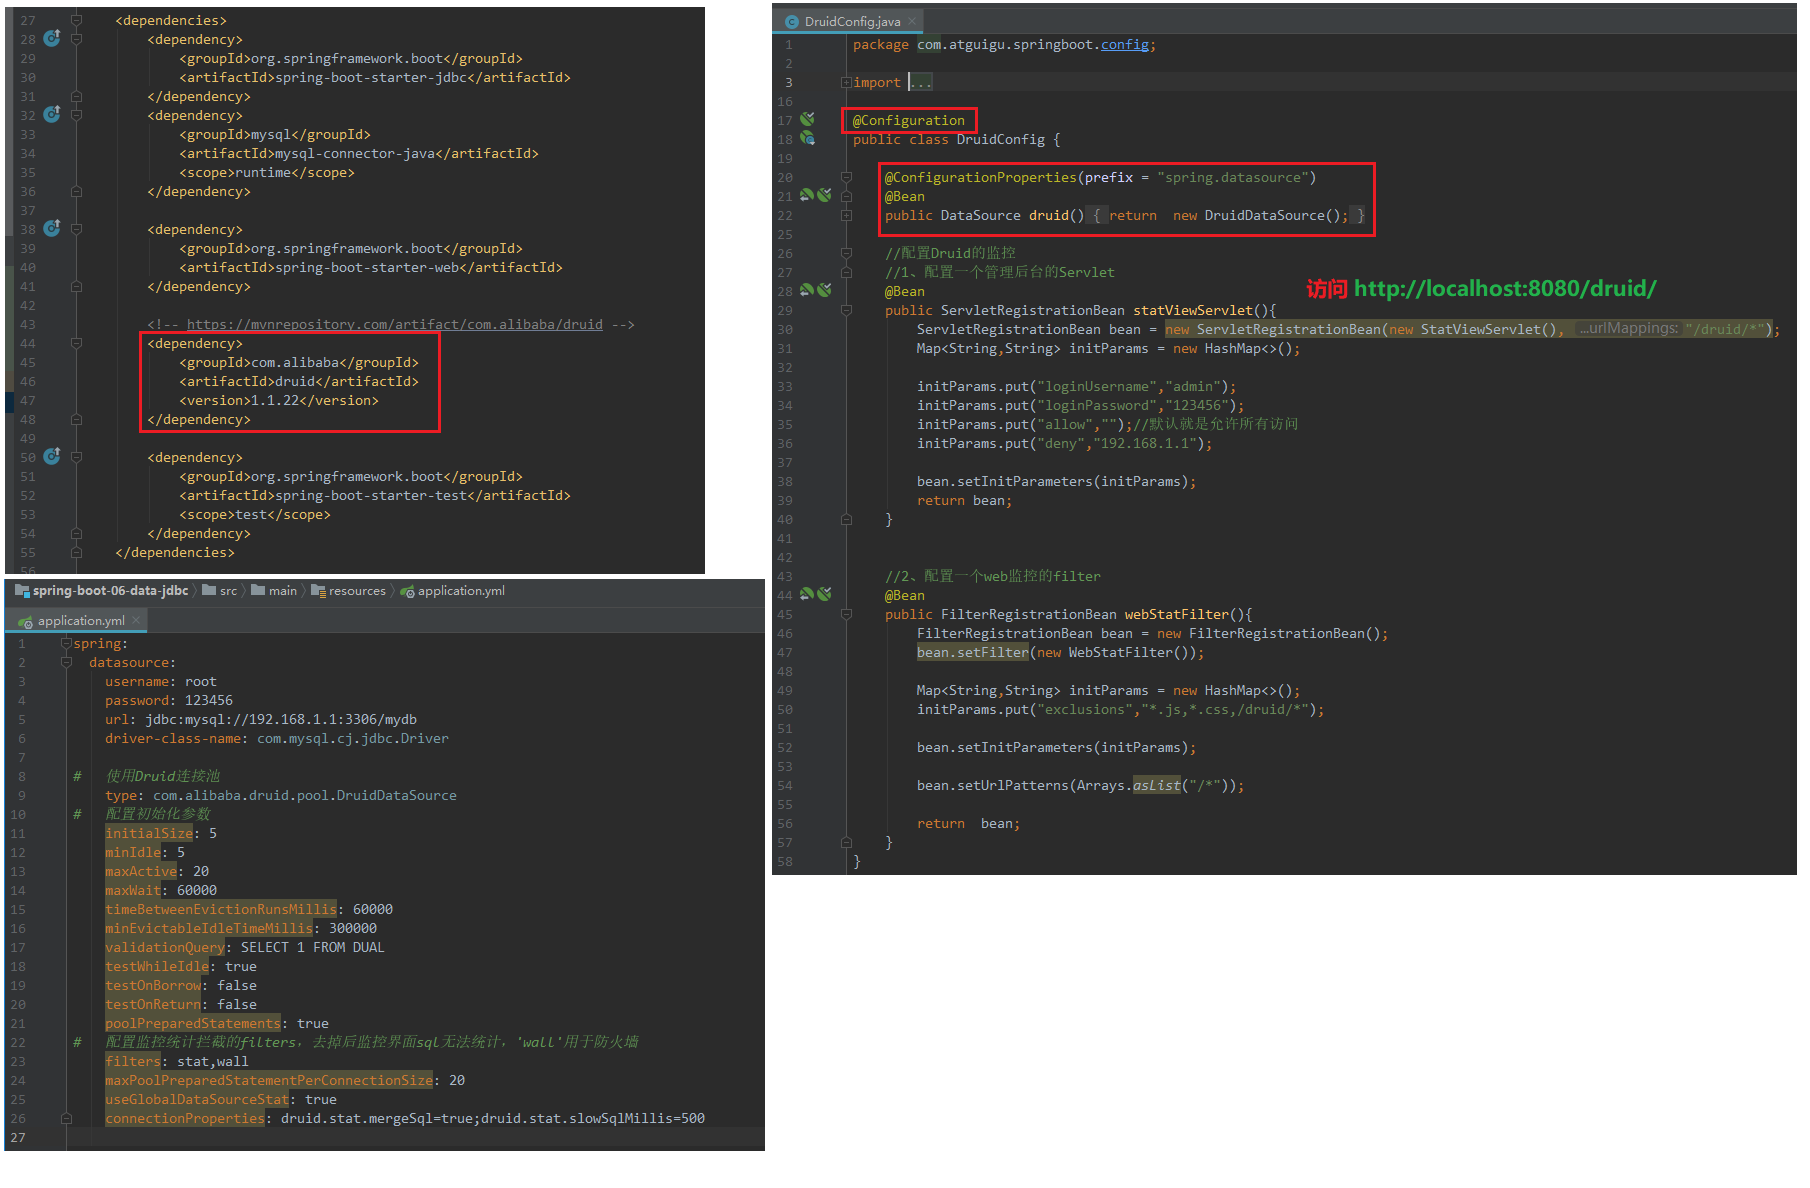
1 | <!-- https://mvnrepository.com/artifact/com.alibaba/druid --> |
application.yml
1 | spring: |
DruidConfig.java
1 | package com.atguigu.springboot.config; |
整合MyBatis
更多Mybatis的内容参考Mybatis小总结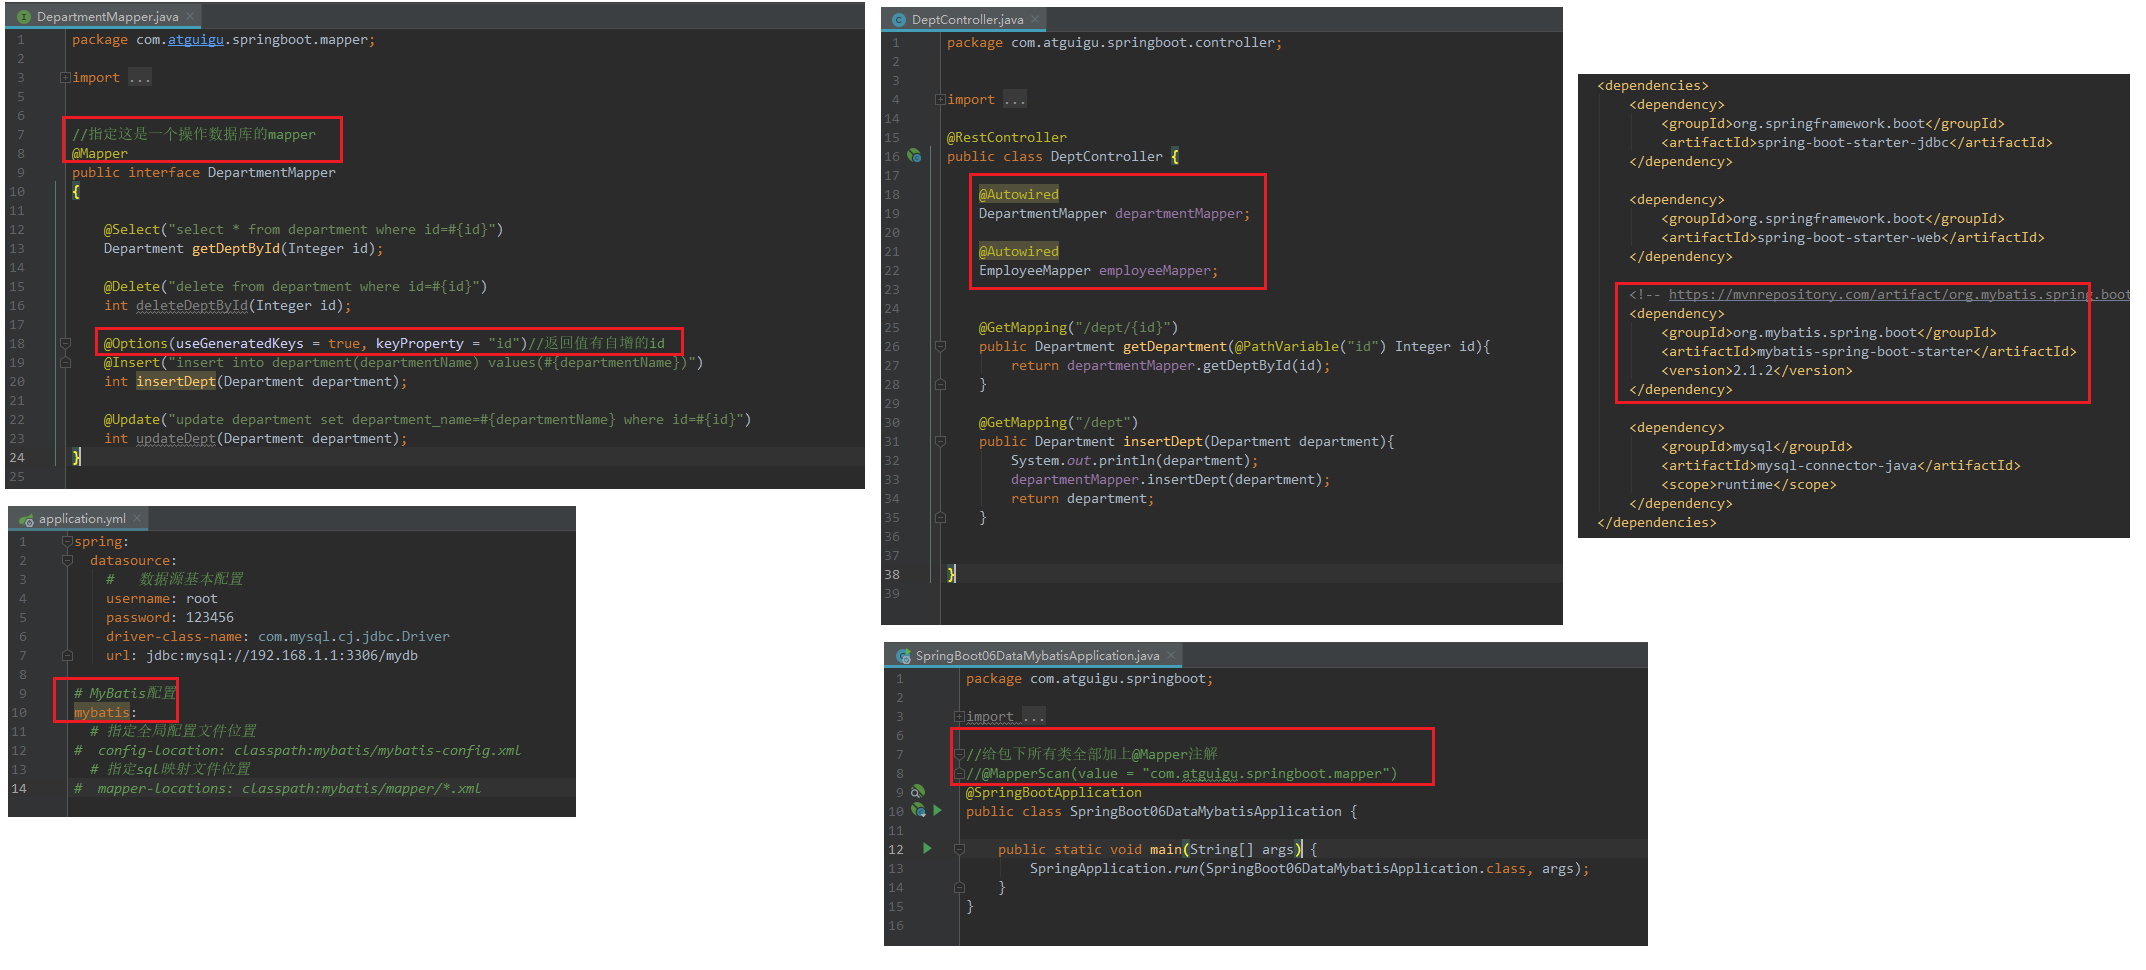
1 | <!-- https://mvnrepository.com/artifact/org.mybatis.spring.boot/mybatis-spring-boot-starter --> |
整合SpringData JPA
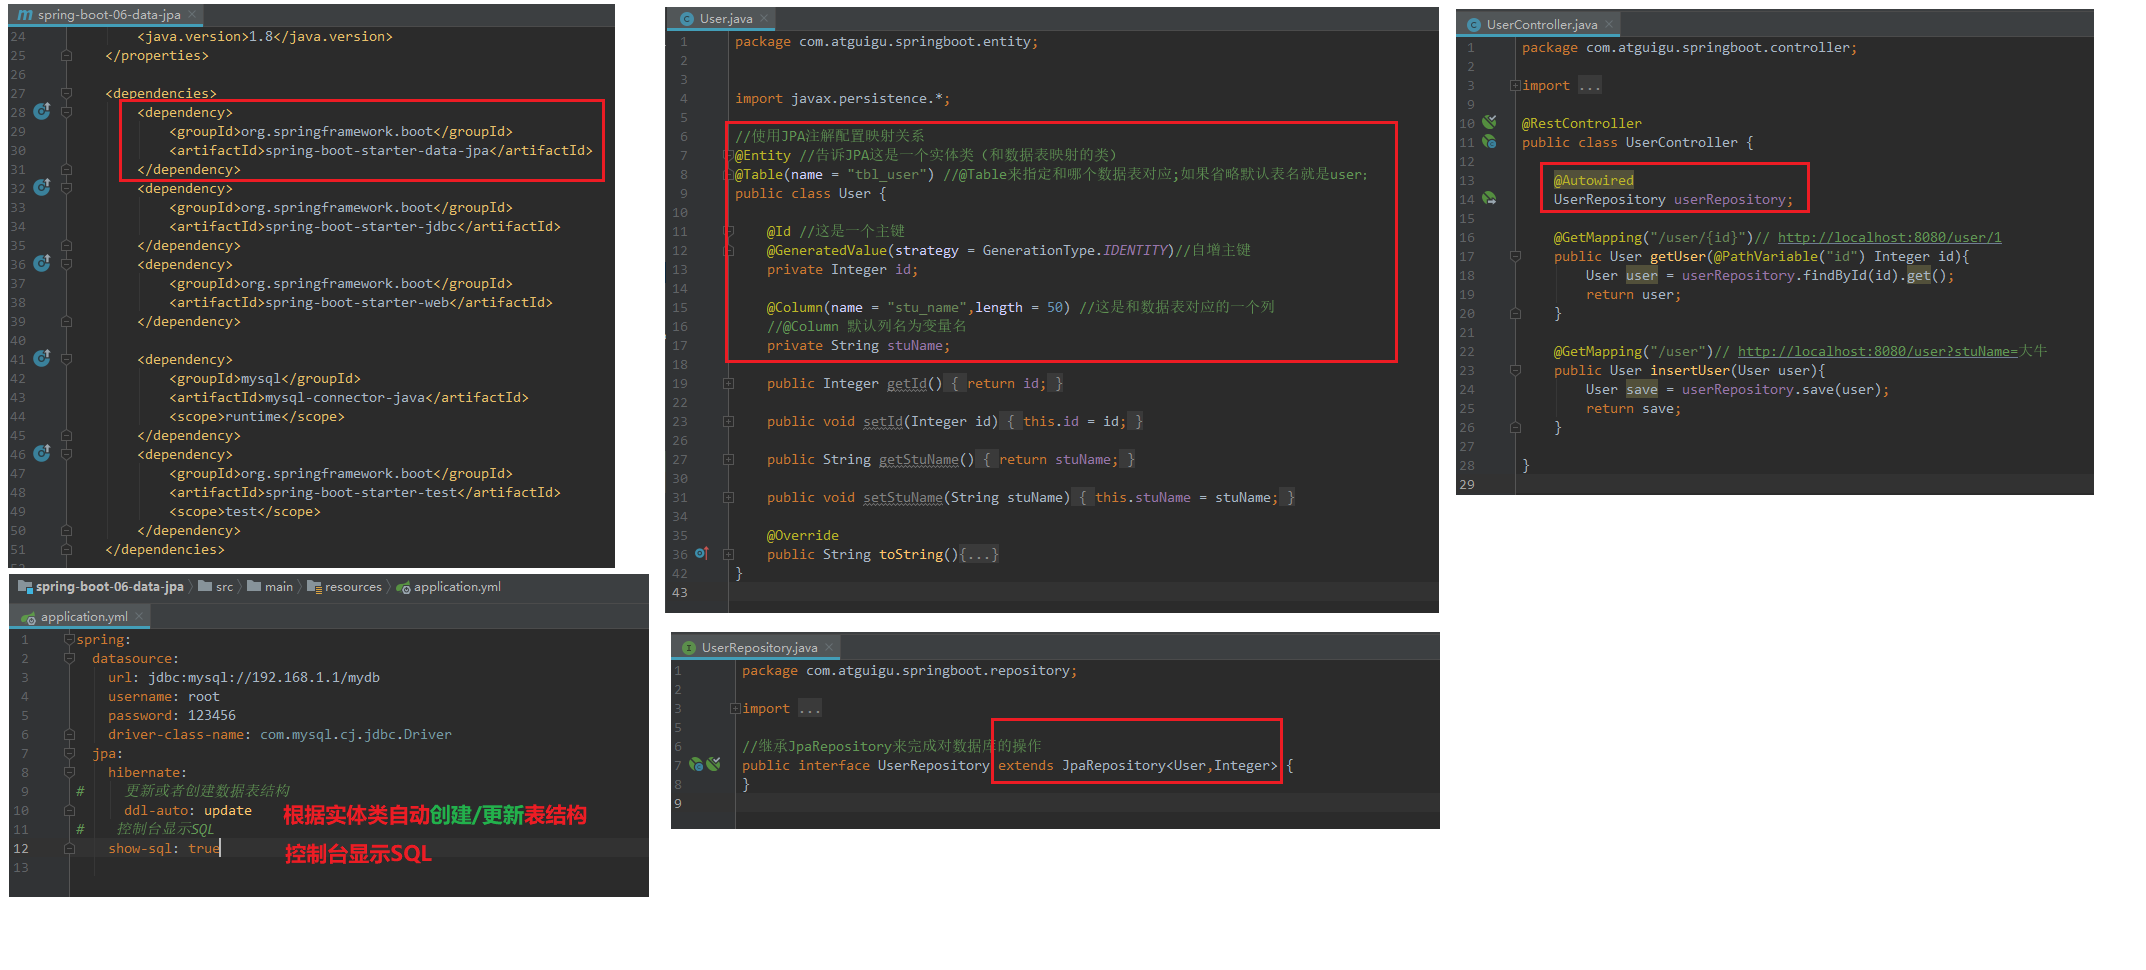
1 | <dependencies> |