B站视频
操作笔记 09_vue/视频3:uni-app 小兔鲜
2023-09-07 08:34:13(开始)
2023-09-11 18:34:08(结束) 项目3天(8 9 11)
.
.
.
本文相关链接:
项目文档
接口文档
uniapp官网
HBuilderX项目 创建并运行
1、下载、安装 下载 微信开发者工具
2、打开 => 微信扫描登录
3、设置 打开端口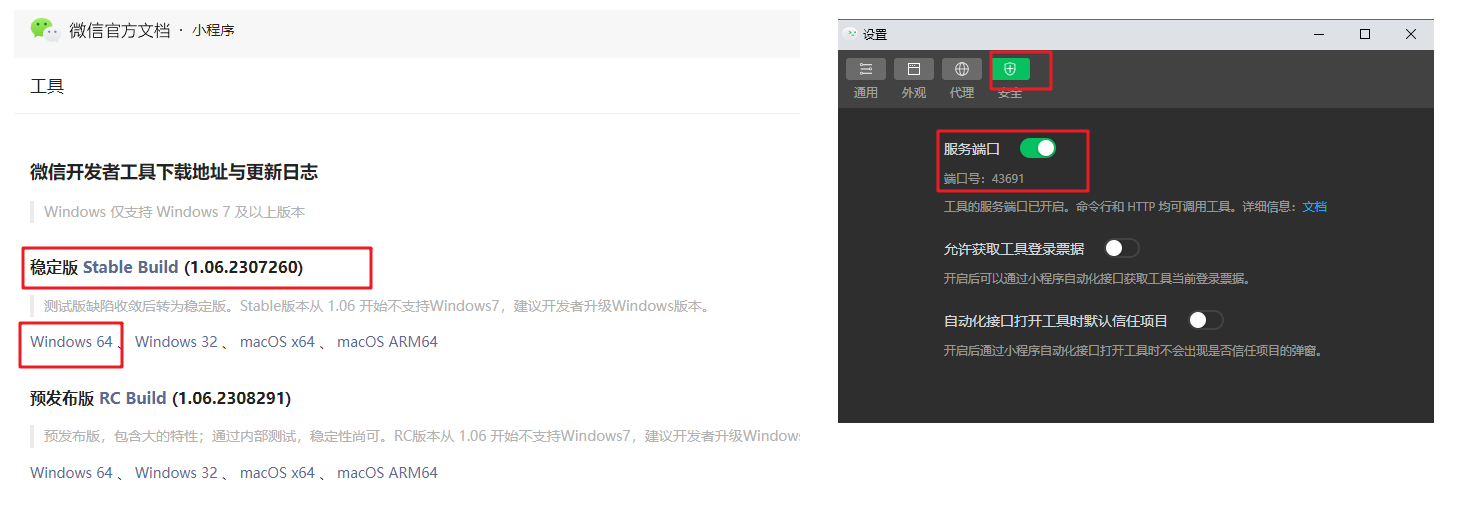
微信开发者工具 => 预览、调试
HBuilderX => 撸代码
1、下载zip、解压并运行
下载 HBuilderX
2、创建 uni-app、并运行、热更新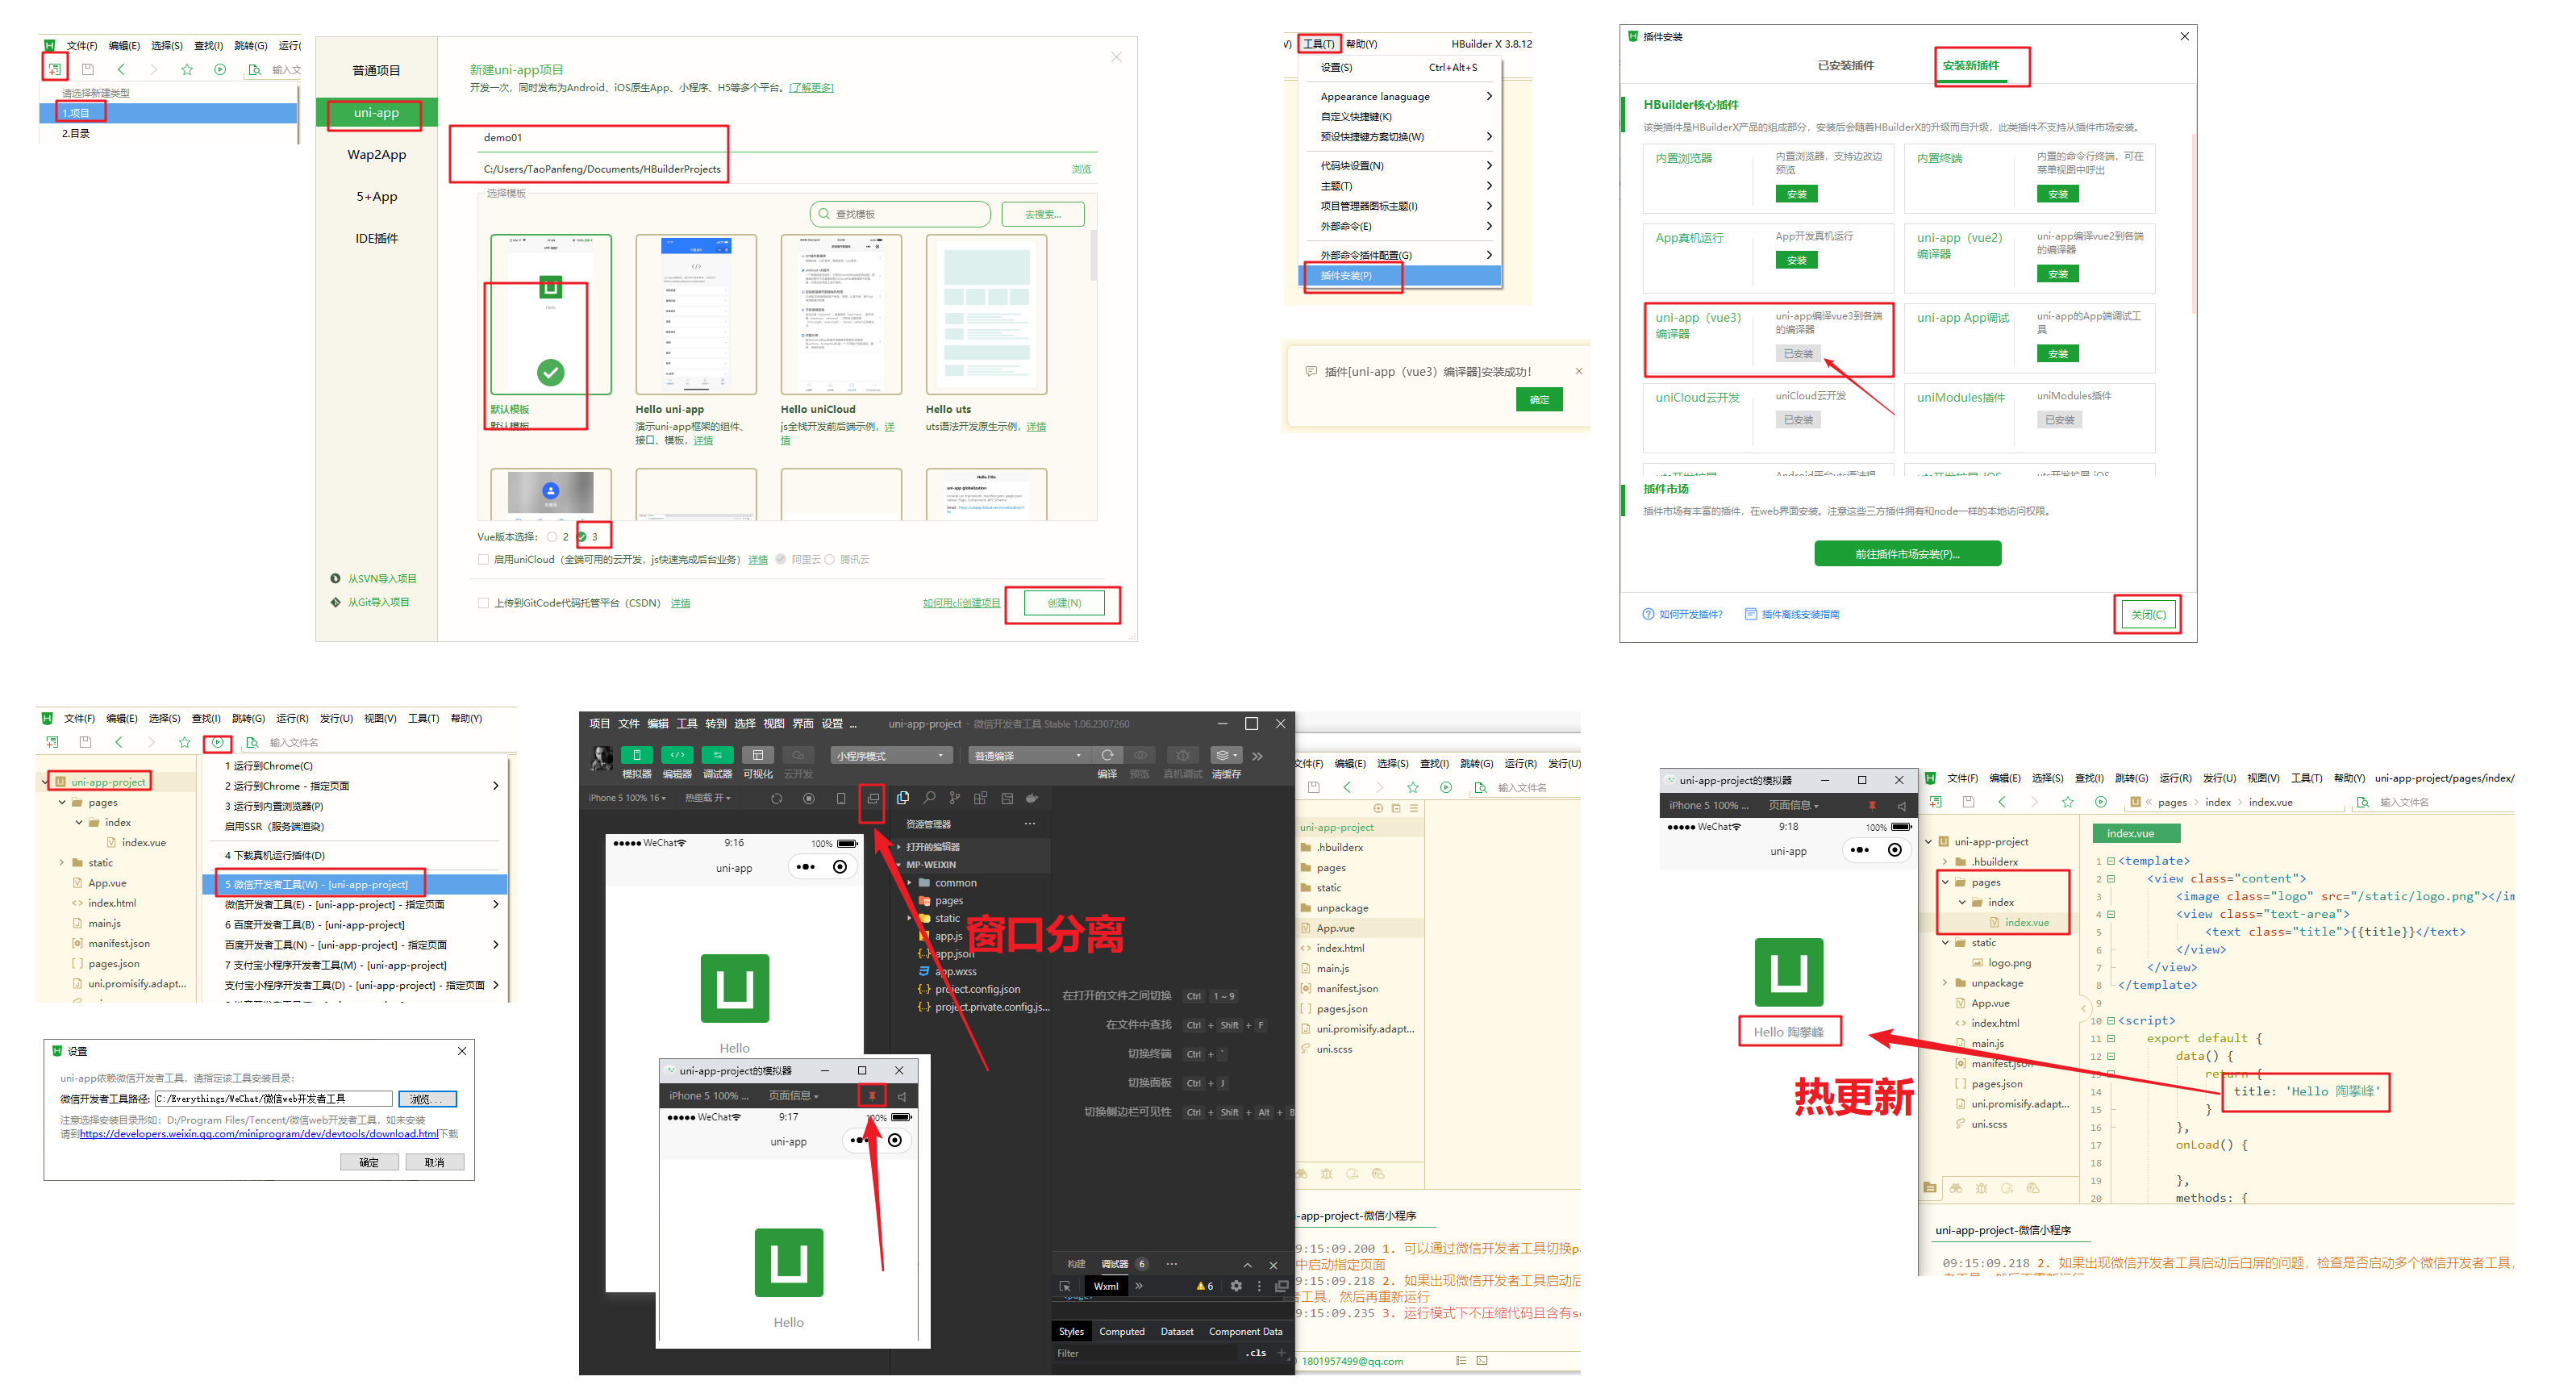
新建页面my、配置tabbar

1 | { |
轮播图案例
1 | + 调用接口能力,建议前缀 wx 替换为 uni ,养成好习惯,支持多端开发。 |
// index.vue 报错:记得刷新(微信开发者工具:重新编译)
1 |
|
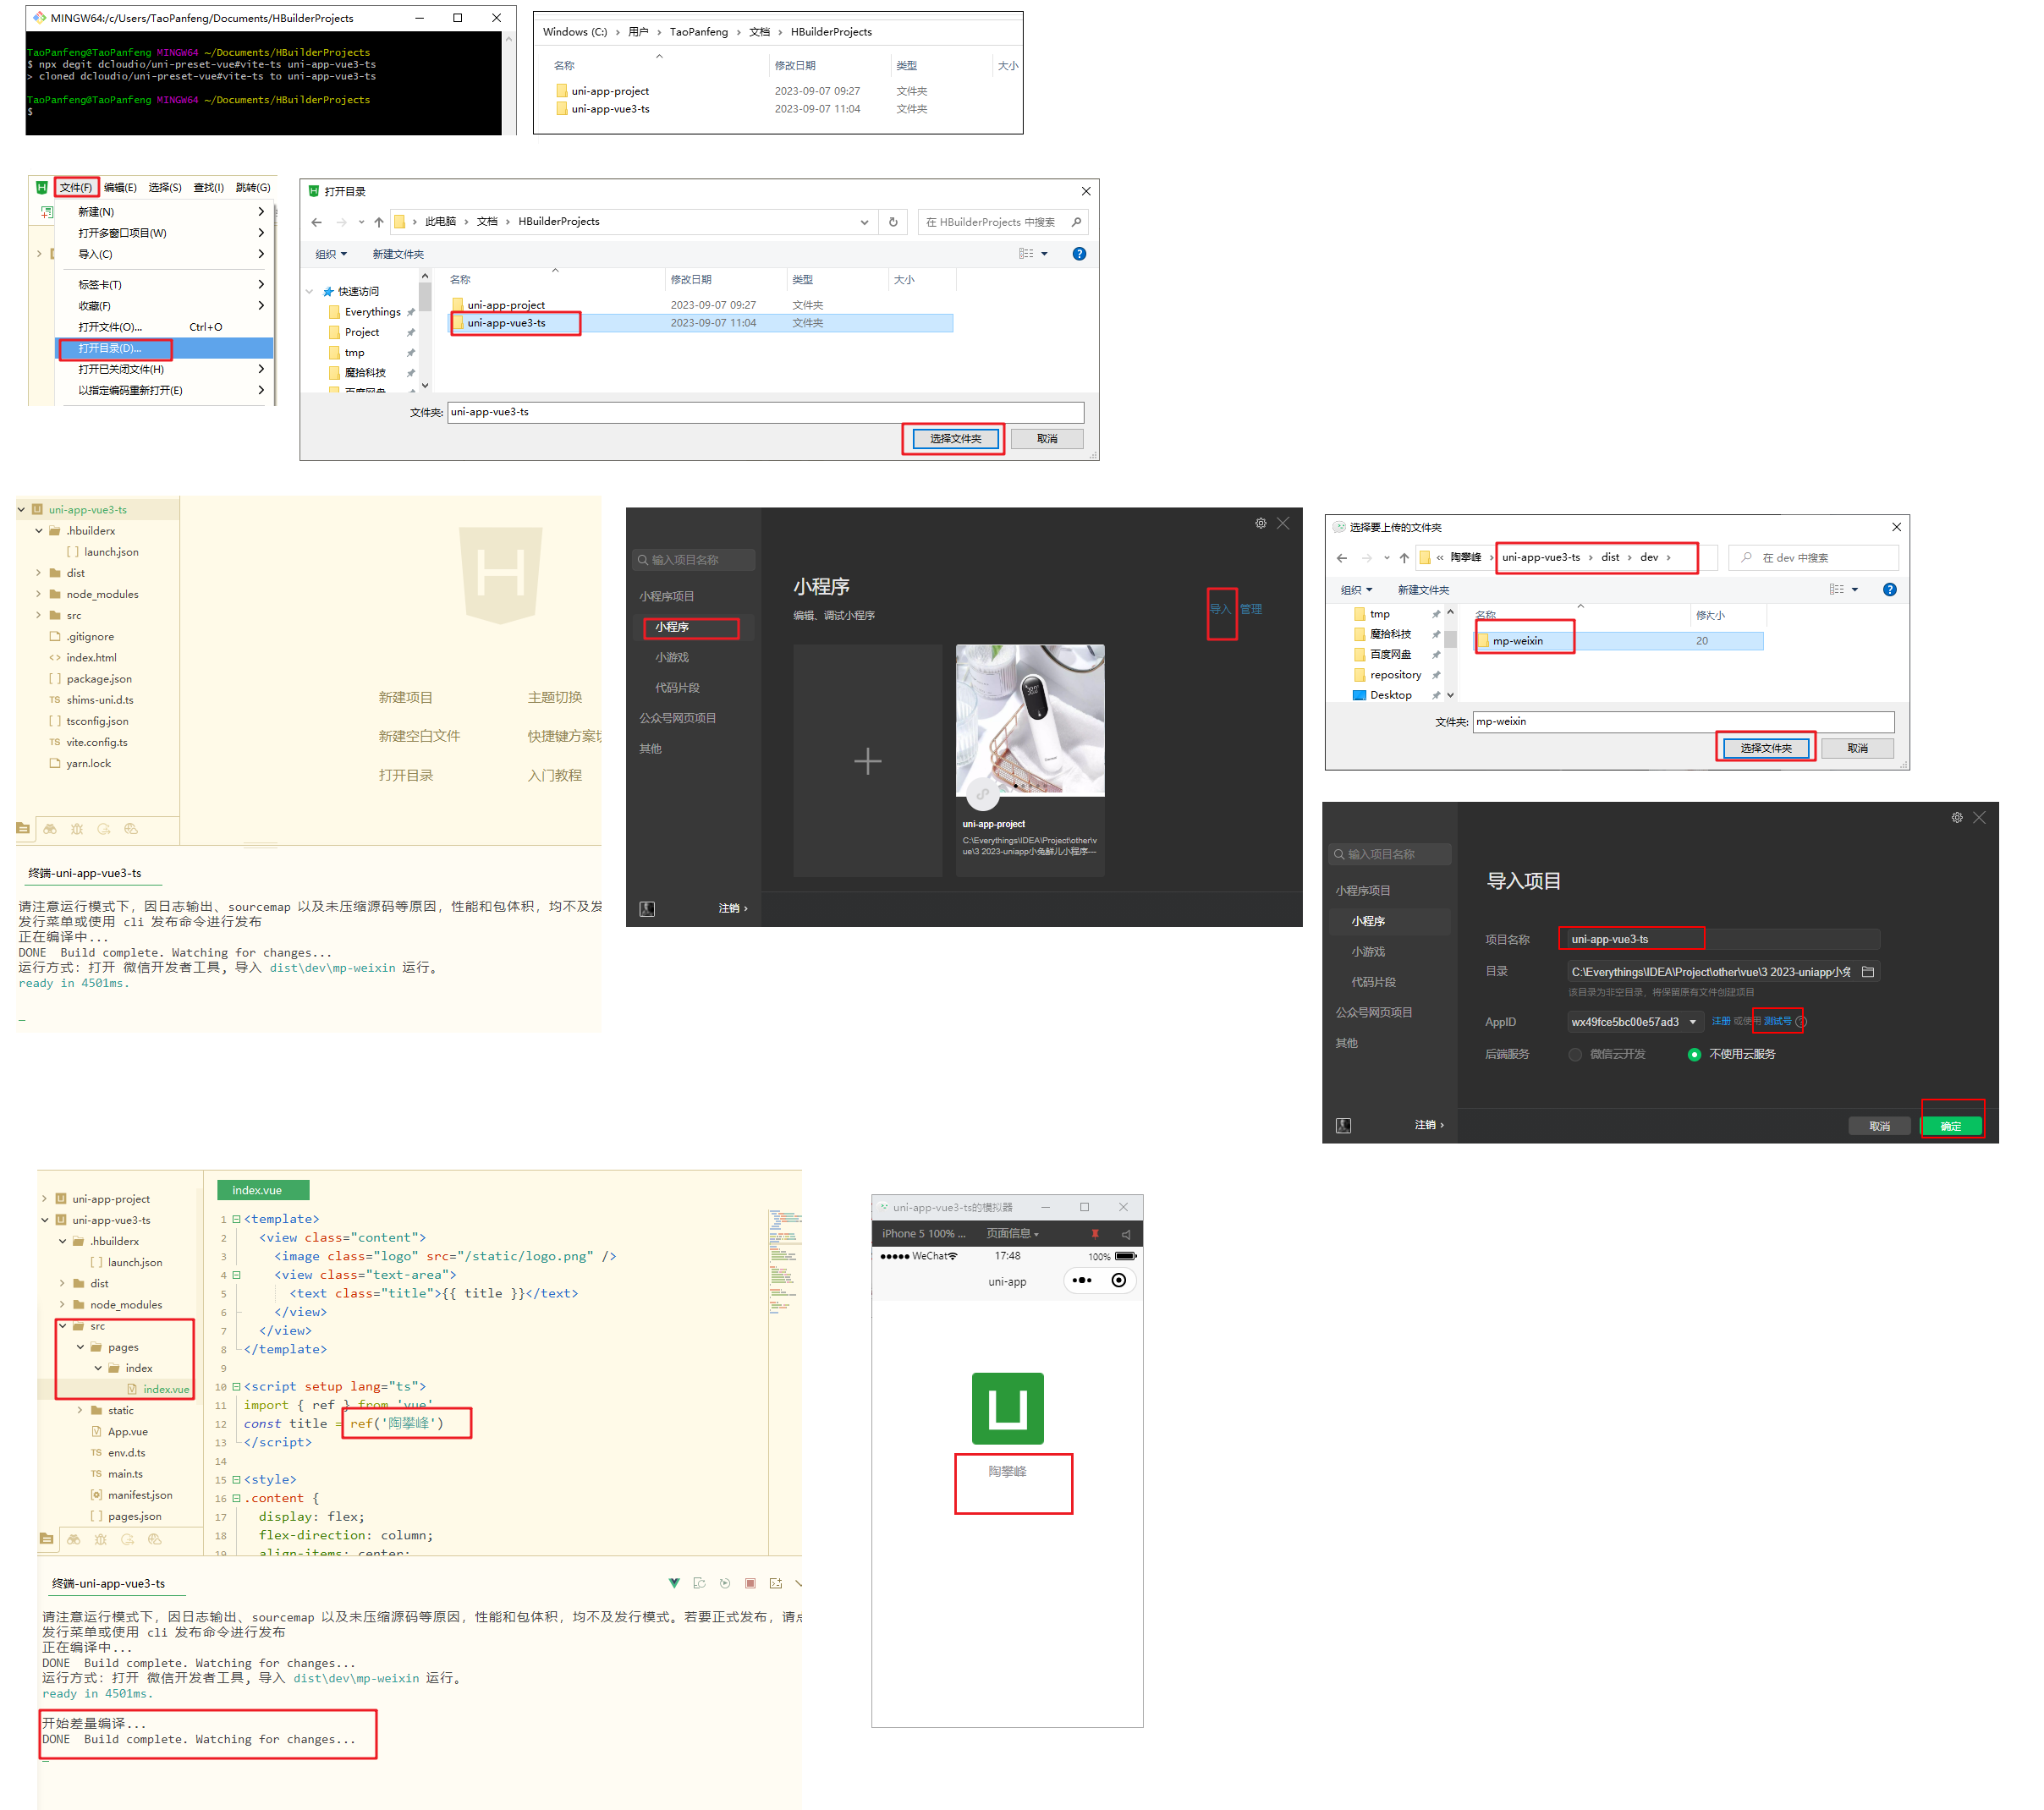
命令行创建
1 | npx degit dcloudio/uni-preset-vue#vite-ts uni-app-vue3-ts |
VS Code
1 | 安装插件 |
右键 pages ‘新建uniapp页面’ ===> 输入 ‘my 我的’
1 |
|
yarn add -D @types/wechat-miniprogram @uni-helper/uni-app-types
配置 tsconfig.json 测试失败
1 | { |
JSON 注释问题 ===> 设置 搜索’文件关联’
- manifest.json jsonc
- tsconfig.json jsonc
- pages.json jsonc
项目起步
项目初始化
git clone http://git.itcast.cn/heimaqianduan/erabbit-uni-app-vue3-ts.git uni-app-rabbit-shop
pnpm install
pnpm dev:mp-weixin
uni ui组件
1 | # 组件 |
持久化
1 | pnpm i pinia-plugin-persistedstate |
关键记录
1 | todo 商品详情:立即购买(校验地址选择) 地址选择 && 立即购买跳转渲染地址 |
- 小程序持久化
- 屏幕安全区域
- 自动导入
- 滚动容器
- 骨架屏
- 不同参数 设置标题
- 商品无限加载
- 猜你喜欢组件封装
- 分包预下载
- 侧滑删除组件
- 购物车:修改数量
- 购物车:单选/全选
- 两个购物车页面
- 收货地址pinia
- 支付倒计时
- tabs滑动切换
- 打包路径问题
- 订单列表 加载中
部署
1 | pnpm install |